

Your bread is a masterpiece. Stop treating it like a common commodity by hacking away at its soul. You spent days nurturing that sourdough starter and perfecting the hydration. It's heartbreaking to watch that airy, open crumb collapse under the weight of a dull blade or poor technique. You aren't just cutting a loaf; you're performing the final act of the craft. Learning how to slice artisan bread without crushing it is the difference between a professional presentation and a squashed mess.
Gravity is the enemy of the crumb, but geometry and blade frequency are your solutions. We've mastered the techniques to help you achieve thin, even slices while preserving that beautiful "ear" and crust aesthetic. This guide covers the essential "Side-Slice" method, the mandatory cooling times, and the professional tools like The Sourdough Knife that respect your hard work. You'll move from tearing through crusts to gliding through them with effortless precision. Let's ensure your bread gets the specialized attention it deserves.
Key Takeaways
- Stop the squash. Identify the "Tension Gap" between your crust and crumb to prevent structural collapse before you even start cutting.
- Master the professional Side-Slice method to learn how to slice artisan bread without crushing it by bypassing destructive vertical pressure.
- Upgrade your toolkit. Discover why specific serration patterns are non-negotiable for hard crusts and how The Sourdough Knife respects your bread's architecture.
- Apply the "Violin Stroke" technique to adapt your grip for various loaf shapes, ensuring perfect, airy slices every time.
- Preserve the airy interior longer by following the "Cut-Side Down" rule and utilizing a breathable beeswax Bread Bag for superior storage.
Why Your Sourdough Squashes: The Science of Crumb Crushing
Crumb crushing is the structural collapse of your bread's internal architecture. It's a technical failure of gelatinized starch. During the bake, starch molecules absorb water and swell into a delicate web. If you cut too early, that web is still liquid and unstable. You're effectively melting the interior under the pressure of the blade. It's a heartbreaking end to a process that took days to perfect.
There's a physical conflict at play called the Tension Gap. This is the extreme difference between your rock-hard, caramelized crust and the airy, fragile interior. Most home bakers try to power through the crust with brute force. This downward pressure is the primary enemy of an open crumb. You need tools designed for this specific challenge. Understanding the physics of serrated blades of bread knives is the first step toward mastery. These blades use a sawing motion to bypass the Tension Gap without compromising the loaf's shape.
Steam is the hidden culprit. As your loaf cools, moisture migrates from the center to the crust. Slicing too early releases this steam prematurely. This doesn't just dry out the bread; it causes the crumb to seize and go gummy. You end up with a texture that sticks to the knife and refuses to bounce back. It's a waste of high-quality flour and your valuable time.
The Cooling Rule: Why Patience is a Tool
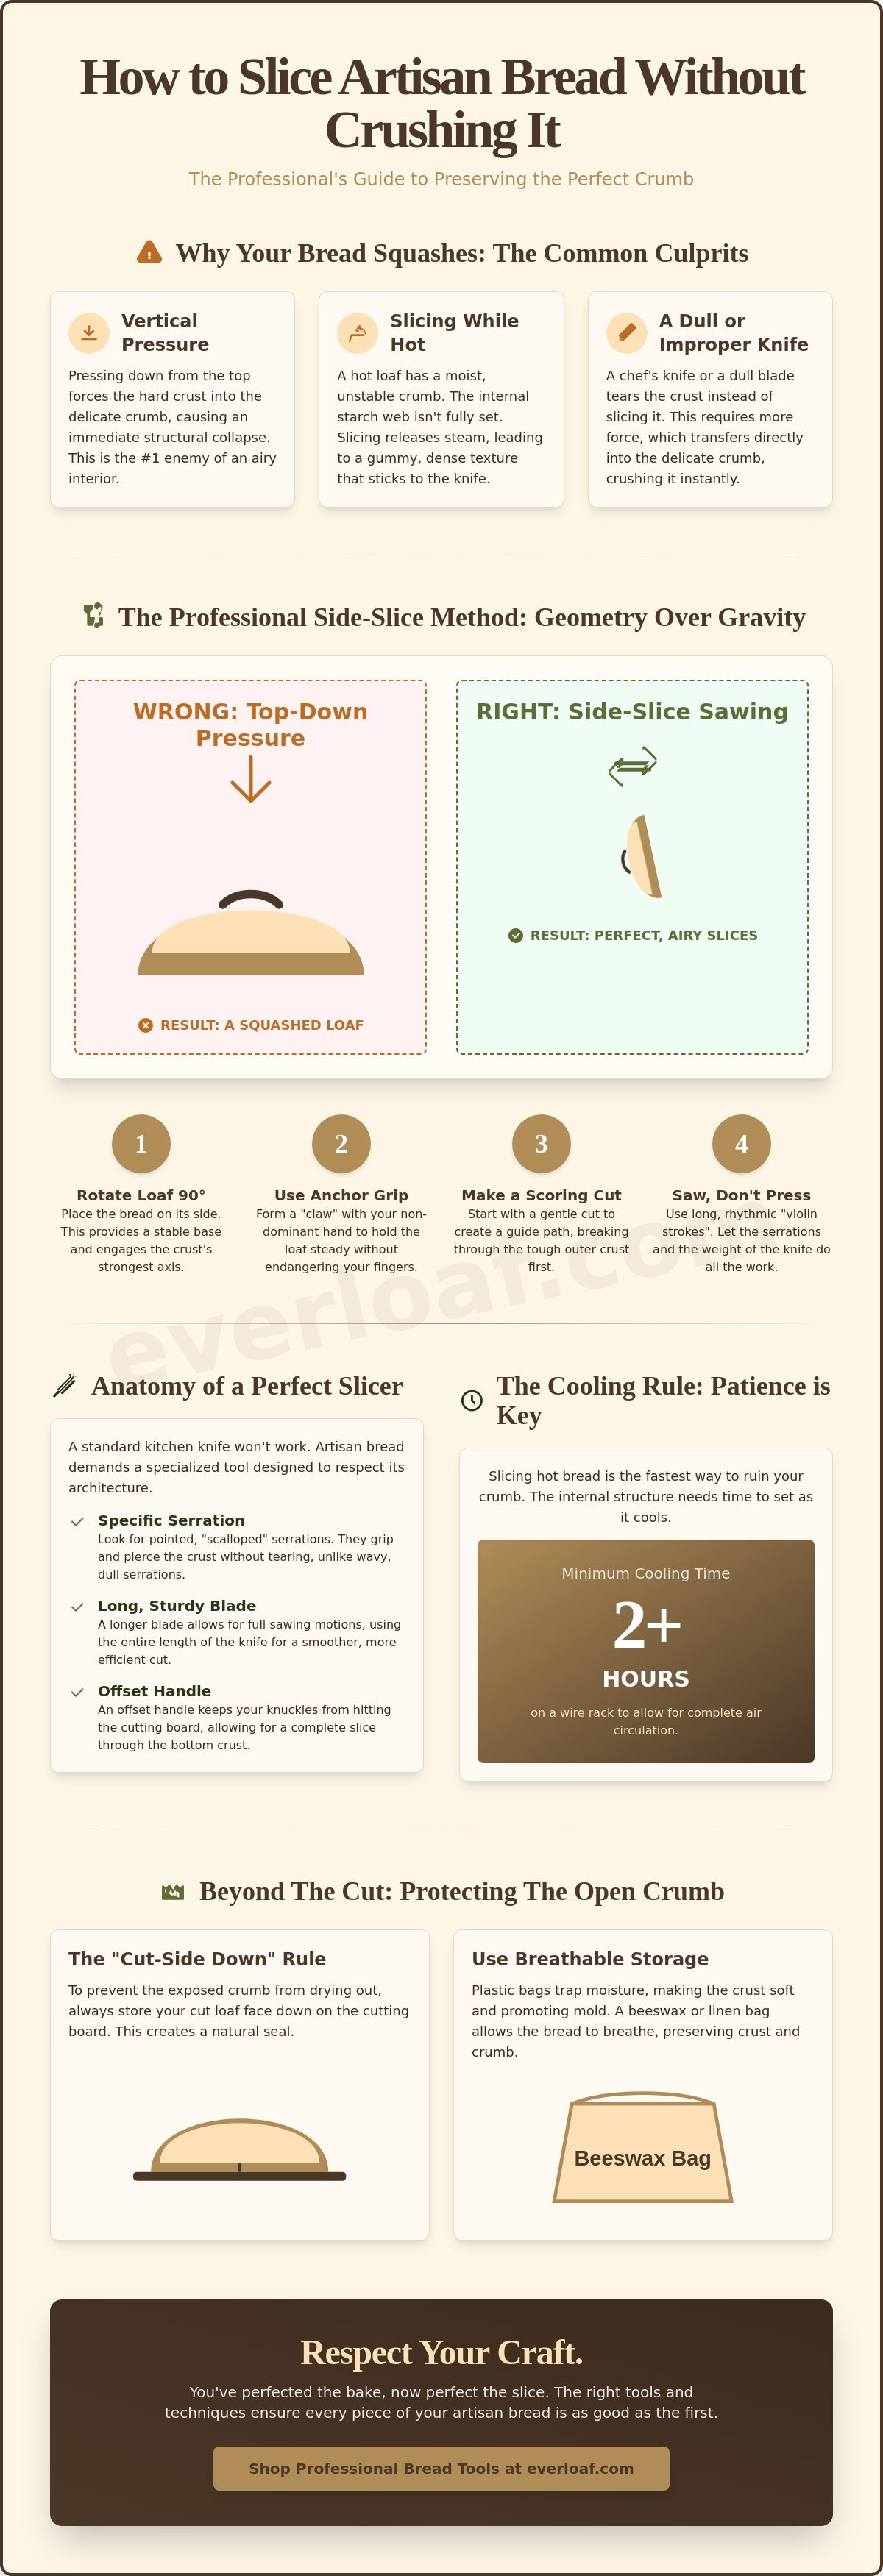
Patience isn't just a virtue; it's a technical requirement. Slicing a loaf when the internal temperature is above 150°F is the danger zone. Starch retrogradation needs time to complete. Give your loaf a 2-hour minimum rest on a wire rack. Residual heat is still working to set the internal structure even after it leaves the oven. If you're unsure, use a temperature probe or listen for the "hollow tap." A finished loaf should sound like a drum when struck on the bottom.
Moisture and the 'Gummy' Crumb
Moisture acts as a lubricant for structural collapse. High-hydration loaves are beautiful, but their thin internal walls are incredibly fragile. Over-proofing makes this even worse. It leaves the bread with no structural integrity to resist the knife. Mastering how to slice artisan bread without crushing it means respecting these chemical limits. After the cut, keep your loaf's environment stable. A breathable beeswax Bread Bag is the professional choice for maintaining that perfect balance of moisture and airflow so the next slice is just as perfect as the first.
The Side-Slice Secret: Geometry Over Gravity
Vertical pressure is a crumb killer. When you press down from the top, you're asking the most delicate part of the loaf to support the full weight of your hand and the knife. This is a recipe for disaster. Professional bakers don't fight gravity; they use geometry to their advantage. The Side-Slice method is the gold standard for anyone serious about how to slice artisan bread without crushing it. By rotating the loaf, you engage the crust's strongest structural axis.
Most home cooks struggle with common problems with bread slicing because they treat every loaf like a block of wood. It isn't. It's a living architecture of air and starch. Turning the bread on its side allows the serrations to penetrate the top and bottom crusts simultaneously. This distributes the force and prevents the dreaded wedge shape. It's a simple shift that yields professional results every time.
Step-by-Step: Mastering the Side-Slice
Positioning is everything. Turn your bread 90 degrees so the side sits flat on the cutting board. This might feel counterintuitive at first, but your loaf will thank you. Use an Anchor Grip with your non-dominant hand. Curl your fingers into a claw shape to stabilize the loaf without putting your fingertips in the line of fire. Safety is paramount when handling professional-grade steel.
Start with a Scoring Cut. Gently draw the blade across the side to create a guide path. Don't try to go deep immediately. Once you've broken the skin of the crust, begin a long, rhythmic Sawing Motion. Use the full length of the blade. Let the weight of the steel do the work. If you find yourself pushing down, stop. Reset. Your hand should only provide the horizontal momentum, never the vertical force.
When to Use This Unorthodox Method
This technique is a lifesaver for high-domed boules. Their height makes them unstable for traditional top-down slicing. It's also essential for delicate, airy brioche or enriched loaves where the crumb is too soft to resist even slight pressure. You'll find it much easier to maintain the integrity of the loaf when you aren't fighting its natural curves.
Using the side-slice prevents bottom-crust blowouts. This happens when the knife finally breaks through the bottom of a sourdough loaf and tears the crust away from the crumb. By cutting from the side, you exit through the side, keeping the bottom intact. This precision is perfect for ultra-thin sandwich slices that hold their shape. Once you've achieved the perfect slice, keep the rest of the loaf pristine in a breathable cotton bread bag to maintain that hard-earned texture.
The Anatomy of a Perfect Slicing Tool
Your standard chef’s knife is failing you. It is designed to chop and dice, but artisan bread requires a different physics entirely. A smooth blade acts like a wedge. It pushes the crust into the soft interior before it even begins to cut. This is why learning how to slice artisan bread without crushing it starts with selecting the right steel. If your tool isn't specialized, your technique won't matter.
Serration is the soul of the bread knife. Teeth matter. Pointed serrations act like a precision saw, biting into a caramelized exterior with ease. Scalloped edges are gentler but often slip on a thick, dark sourdough crust. You need a blade that grips the surface immediately. This initial "bite" prevents the knife from sliding and damaging the delicate "ear" of your loaf.
Size is a functional requirement, not a preference. A 10-inch blade is the "Goldilocks" length for sourdough. It allows for long, sweeping strokes that utilize the entire edge. Short knives force a "hacking" motion. This creates unnecessary downward pressure and leads to uneven, wedge-shaped slices. A heavier blade provides the necessary force through its own mass. You simply guide it; the knife does the work.
Serrated vs. Specialized Sourdough Knives
Traditional bread knives are often too flexible for dense artisan loaves. Specialized tools like The Sourdough Knife offer a stiffer spine and better control. Consider an offset handle. This design raises your hand above the cutting surface. It prevents your knuckles from hitting the board, allowing for a full, clean stroke through the bottom crust. For a deeper dive into the best options on the market, check out our guide on the Best Knife for Cutting Sourdough Bread: The 2026 Professional Guide.
Maintenance: A Dull Blade is a Crusher
A dull edge is a dangerous crusher. When teeth lose their point, you instinctively apply more downward pressure to compensate. This is the exact moment the crumb collapses. Watch for signs of wear, such as the blade "skating" off the crust or requiring multiple strokes for a single slice. Keep your tools in peak condition by following our How to Sharpen a Bread Knife checklist. Respect your tools, and they will respect your bread.
Professional Techniques for Every Loaf Shape
Every artisan loaf presents a unique structural challenge. You cannot treat a long, slender baguette the same way you treat a massive, high-hydration boule. Mastery requires adapting your grip and blade angle to the specific geometry of the bread. The "Violin Stroke" is your universal foundation. Use the full length of the blade in long, rhythmic motions with almost zero downward pressure. This is essential for how to slice artisan bread without crushing it, regardless of the shape.
Decorative features like "The Ear" often intimidate home bakers. Don't avoid it. Use the side-slice method to enter the loaf through the ear. This preserves the aesthetic without causing a collapse. For loaves loaded with inclusions like walnuts, seeds, or dried fruit, a sharp, heavy blade is non-negotiable. You must cut through the additions cleanly. A dull blade will snag on a walnut and drag it through the soft crumb, leaving a cavernous hole behind.
Example 1: The Classic Boule (Round)
Round loaves are notoriously unstable. Start with the "Halving" strategy. Slice the entire boule directly down the center. This creates two stable, flat faces. Place the cut side down on the board. Now, slice from the flat face toward the crust. This provides maximum support for the interior and helps you manage the varying height of the dome without squashing the center.
Example 2: The Batard (Oval)
The batard is built for the "Bias Cut." Slice at a 45-degree angle rather than straight across. This creates a larger surface area for toppings and a more professional presentation. As you reach the tapered ends, your grip becomes critical. Stabilize the narrow tip with your fingers curled safely away. Maintaining consistent thickness across a long profile is easier when you let the weight of the knife dictate the depth of the cut.
Example 3: The Baguette (Long & Thin)
Baguettes are all about crust-to-crumb ratio. Use a high-frequency sawing motion. This prevents the "shatter" effect common on very dry, thin crusts. Try the "Scissor Cut" by holding the knife at an extremely steep angle. This produces long, elegant ovals perfect for crostini. Once your perfect slices are ready, protect the remaining crust's crunch by storing the rest in a beeswax-lined cotton bread bag designed for artisan longevity.
Beyond the Cut: Protecting the Open Crumb
Your work doesn't end when the knife hits the board. The environment where you store your loaf directly dictates your success tomorrow. If you want to know how to slice artisan bread without crushing it on day three, you have to respect the bread's need for a stable climate. Paper bags are a common recommendation, but they're often a trap. They breathe too much. They turn your beautiful, open crumb into a brittle, dry mess that shatters under the blade. A brittle loaf has no internal "give," making it impossible to achieve those thin, professional sandwich slices.
Plastic is the opposite extreme. It's a disaster for artisan crusts. Plastic wrap traps 100% of the moisture, which migrates from the crumb to the exterior. This turns your crisp, caramelized crust into a rubbery, leather-like skin. A rubbery crust is almost impossible to saw through cleanly. You'll find yourself pushing harder just to get the blade to bite. This unnecessary force leads right back to the structural collapse we've worked so hard to avoid. You need a storage solution that offers breathability without total dehydration.
The "Cut-Side Down" rule is your first line of defense. Always store your loaf with the exposed interior facing the bottom of your storage container or bag. This simple geometric trick uses the surface to seal the crumb. It prevents moisture from escaping through the open cells, keeping the center pillowy while the crust maintains its protective integrity. It’s a small habit that yields massive rewards for the longevity of your bake.
The Beeswax Advantage for Slicing
Beeswax is the professional’s secret weapon for moisture control. It creates a semi-permeable barrier that lets the bread breathe while holding in enough hydration to keep the crumb soft. It’s the perfect middle ground between the "too-dry" paper bag and the "too-wet" plastic wrap. By choosing to keep your bread fresh with The Beeswax Bread Bag, you ensure the crust stays firm enough to provide the necessary resistance to the knife. This balance is what makes tomorrow's slicing experience effortless.
Reviving a 'Crushable' Loaf
Sometimes a loaf gets too hard despite your best efforts. A rock-hard crust is a slicing nightmare that often leads to torn interiors. Don't hack at it. Use the "Mist and Toast" method to restore the loaf's geometry. Lightly spray the crust with water and pop it into a 350°F oven for five minutes. This softens the exterior just enough for the teeth of your blade to grab hold. If you’re dealing with a day-old loaf that has lost its structural tension, return to the side-slice method. For more detailed storage strategies, read The Ultimate Beeswax Bread Bag Guide to keep your sourdough at peak performance for up to 10 days.
Master the Final Act of Your Craft
Your bread is more than just food. It is a testament to your patience and skill. Don't let a poor cut ruin days of hard work. By respecting the cooling process and utilizing the side-slice method, you preserve the structural integrity of every loaf. You now have the professional blueprint for how to slice artisan bread without crushing it. Slicing is no longer a chore; it is a celebration of the open crumb.
The right tools make all the difference. Our community of home bakers agrees. With over 1,000 5-star reviews, our specialized gear is the gold standard for high-hydration crusts. These tools are used by Lyon-trained professionals who understand that quality items deserve specialized attention. Your sourdough has inherent needs. It is time to treat it with the reverence it deserves. Stop hacking and start gliding.
Respect the crumb—upgrade to the Everloaf Sourdough Knife today.
Go ahead and slice with confidence. Your perfect, airy interior is waiting to be revealed. We can't wait to see your results.
Frequently Asked Questions
How long should I wait before slicing artisan bread?
Wait at least two hours before you even touch the knife. Your loaf needs this time for the internal temperature to drop below 150°F. This allows the starch to set and the moisture to redistribute. Slicing too early is the fastest way to ruin the texture you worked so hard to create.
What is the best knife for cutting sourdough without squashing it?
A 10-inch serrated blade with pointed teeth is the gold standard for home bakers. You need a tool with enough length to use long, sweeping strokes. The Sourdough Knife is designed specifically for high-hydration crusts. It provides the necessary bite to master how to slice artisan bread without crushing it every single time.
Can I use an electric knife for artisan bread?
It's possible, but it's rarely the best choice for a thick, artisan crust. Electric knives often lack the torque required to penetrate a hard, caramelized exterior without vibrating the crumb to pieces. A high-quality manual serrated knife gives you far more control. It respects the delicate internal architecture of your bread.
Why does my bread crumble when I slice it?
Crumbling usually means your loaf is too dry or over-fermented. When the gluten structure is weak or the moisture has evaporated, the bread loses its elastic strength. It can't hold together under the pressure of the blade. Ensure you're storing your loaf in a breathable environment to maintain the proper moisture balance.
Is it better to slice bread warm or cold?
Always slice your bread at room temperature. Slicing warm bread is a technical error that leads to a gummy, collapsed interior. The steam inside the loaf is still active and hasn't finished setting the starch. If you cut it while it's hot, the crumb will seize and lose its airy quality instantly.
How do I get thin sandwich slices from a round boule?
Cut the boule in half first to create a stable, flat base. Place the cut side down on your board and use the side-slice technique. This geometry allows you to maintain a consistent thickness without fighting the curve of the dome. It's the most reliable way to get professional results from an awkward shape.
Should I slice the whole loaf at once or as needed?
Slice only what you need for the immediate meal. Once you slice the bread, you increase the surface area and accelerate the drying process. Keep the rest of the loaf intact to protect the interior moisture. Store the remaining portion cut-side down in a beeswax Bread Bag to keep it fresh for days.


