

Your kitchen shouldn't look like a flour explosion just because you want a decent loaf of bread. Most people start their journey feeling overwhelmed by endless equipment lists and the fear of a permanent "sticky dough" mess on their counters. It's a common frustration. You see the beautiful loaves on social media and wonder why your own experience feels so chaotic. Finding the right sourdough baking tools for beginners is the difference between a stressful hobby and a rewarding craft. You deserve a process that feels as good as the bread tastes.
We believe your hard work deserves to last. This guide promises to help you master the art of fermentation with a curated list of gear that ensures success from the first mix to the final slice. You'll get a clear, prioritized shopping list that eliminates the guesswork and saves your budget. We're focusing on tools that make the process cleaner and keep your bread fresh for more than a single day. Discover the essentials that turn sticky dough into a professional masterpiece. Your journey to a perfect, crunchy crust starts right here. Let's get your starter bubbling!
Key Takeaways
- Stop the "sticky hand" struggle immediately. Use The Danish Dough Whisk to cut through dough without clogging your tools or losing vital aeration.
- Build a smarter kitchen. Our curated list of sourdough baking tools for beginners prioritizes quality over quantity so you don't waste money on useless gadgets.
- Secure the perfect crust. Learn why a Dutch oven and a dedicated bread lame are non-negotiable for achieving that elusive artisan oven spring safely.
- Respect your effort after the bake. Use a beeswax Bread Bag to maintain moisture balance and keep your sourdough fresh for up to ten days.
- Simplify your workspace. Master the "Big Four" essential tools to ensure your baking process is cleaner, faster, and far more successful from day one.
Mastering the Mix: Why Beginners Need a Danish Dough Whisk
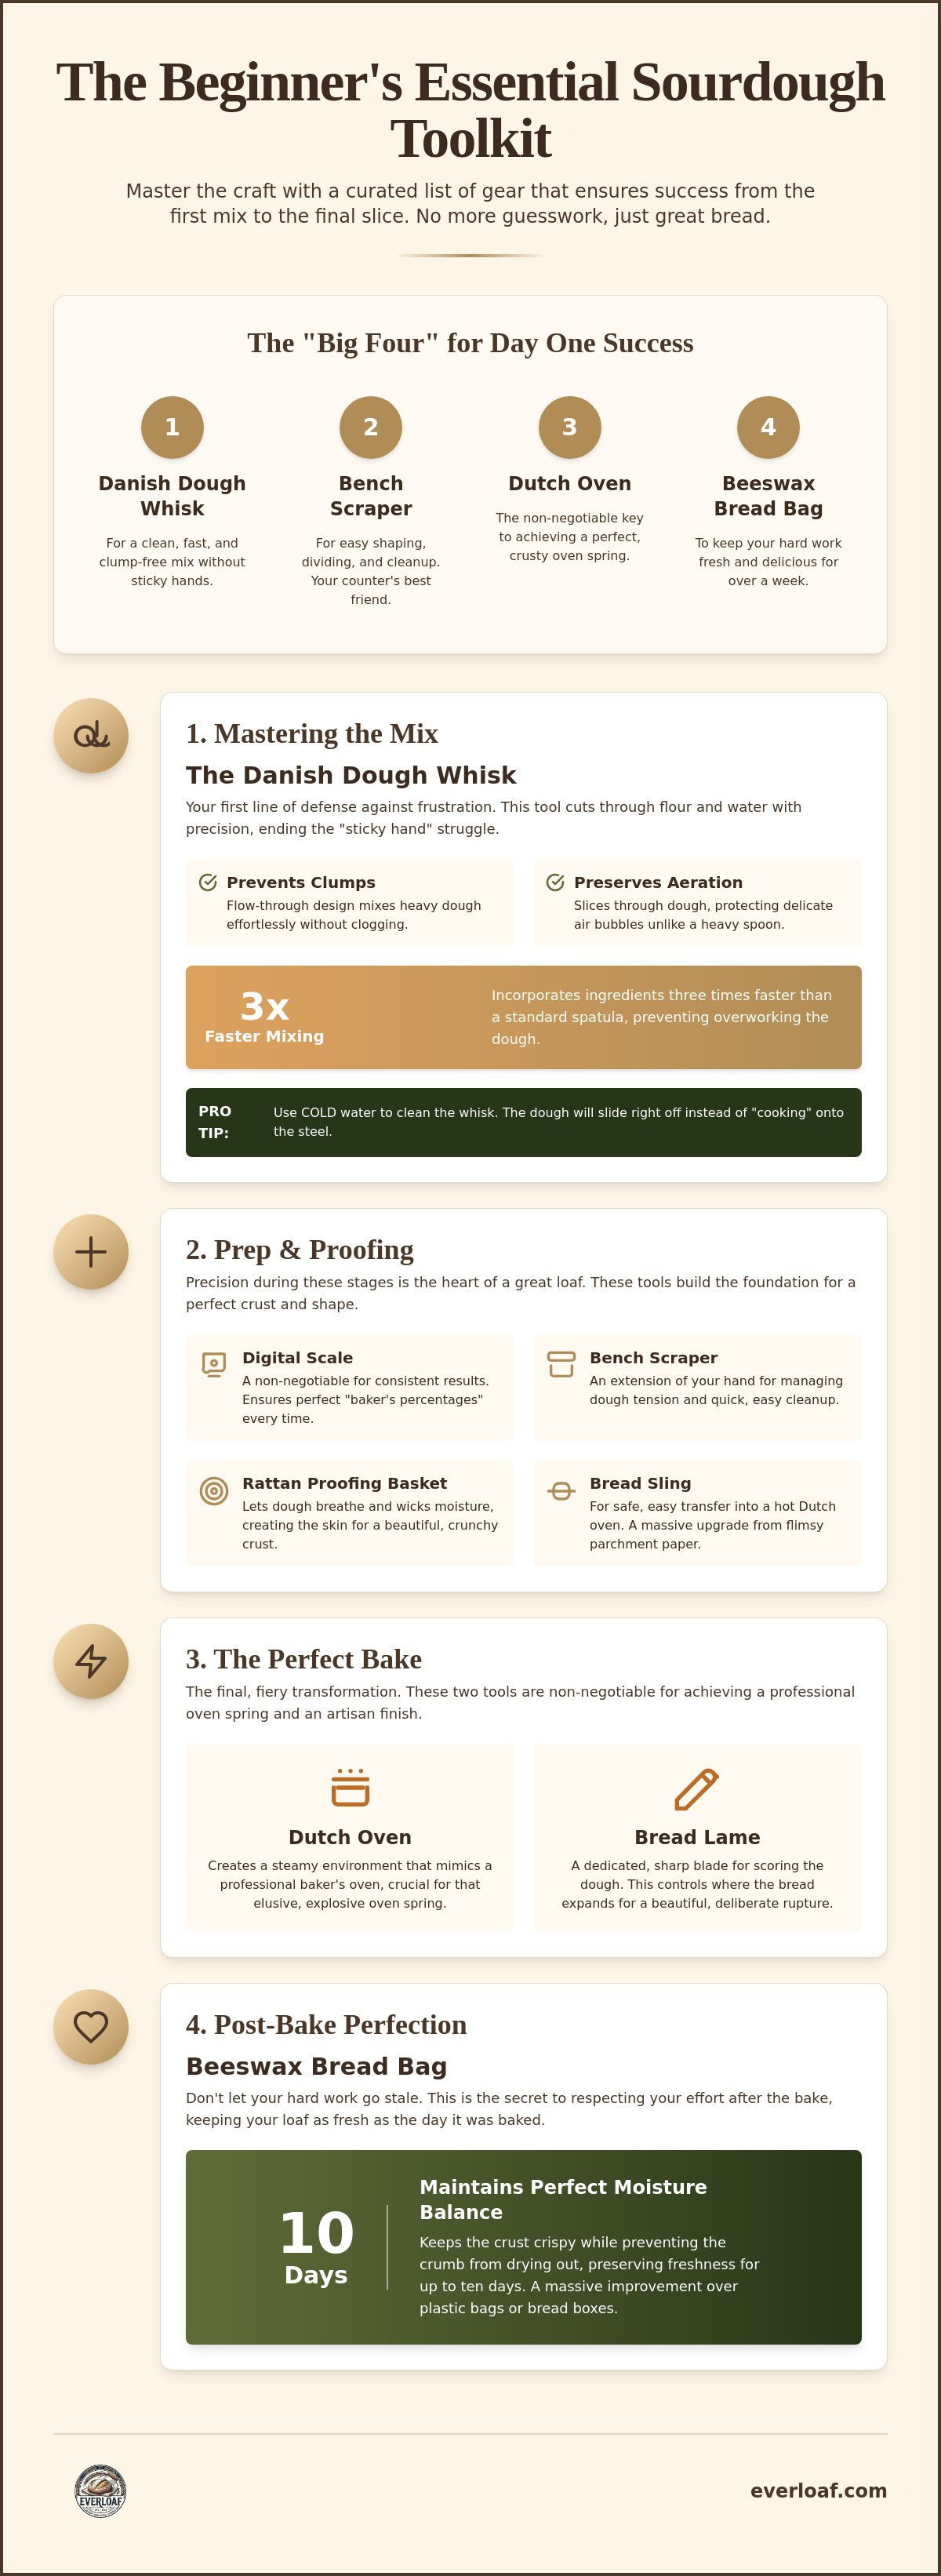
Stop sticking your hands into a bowl of glue. Most beginners think "feeling the dough" requires a literal mess up to their elbows. It doesn't. Your wooden spoon is failing you. It clogs, it snaps, and it leaves pockets of dry flour that ruin your bake. In the world of sourdough baking tools for beginners, The Danish Dough Whisk is your first line of defense against frustration. This tool features three concentric stainless steel loops. It doesn't just stir; it slices through flour and water with surgical precision. It respects your time and your kitchen's cleanliness.
Efficiency is the soul of a good bake. This whisk incorporates ingredients three times faster than a standard spatula. Speed matters because it prevents you from overworking the dough before the fermentation even begins. Understanding What is Sourdough? helps you realize that fermentation is a living process. You need to keep the aeration intact. A heavy spoon crushes the delicate air bubbles you've worked hard to build. The whisk preserves them. It's also surprisingly versatile. Use it for high-hydration sourdough, thick pancake batters, or delicate muffin mixes. It treats every ingredient with reverence.
The Architecture of a Professional Dough Whisk
The flow-through design is pure genius. It prevents the "clump" effect that ruins traditional balloon whisks. Instead of dough getting trapped inside a wire cage, it passes through the loops freely. This makes mixing heavy, artisan-style doughs feel effortless. The ergonomic handle provides the leverage you need for stiff starters. The Danish Dough Whisk is the bridge between the manual feel of hand-mixing and the mechanical efficiency of a mixer. You get the control without the cleanup nightmare. It is a specialized companion for your craft.
Mixing Technique for the First-Timer
Start by adding your water to the starter, then the flour. Use firm, circular motions. You're looking for a "shaggy mass" where no dry flour remains. Stop there. Overworking the gluten too early can lead to a tough, gummy loaf. The whisk does the heavy lifting so your hands don't have to. When you're done, don't use hot water to clean it. Hot water effectively "cooks" the flour onto the steel loops. Use cold water instead. The dough will slide right off. It's a simple trick that saves your sanity. Choosing the right sourdough baking tools for beginners starts with this single, high-impact investment. Your future loaves will thank you.
Prep and Proofing Essentials: From Bench Scrapers to Bread Slings
Precision is the heart of a great loaf. You can't eyeball sourdough and expect professional results. A digital scale is your non-negotiable partner in this process. It ensures your "baker’s percentages" are perfect every single time. Consistent ratios lead to consistent bread. Once you've measured your ingredients, the environment where the dough rests matters just as much. Rattan proofing baskets, or bannetons, are superior to glass bowls because they let the dough breathe. They wick moisture away from the surface. This creates a skin that eventually becomes a beautiful, crunchy crust. Forget disposable plastic covers or shower caps. Your dough needs a natural, breathable home to rise properly.
Selecting the right sourdough baking tools for beginners means choosing items that solve real problems. A bench scraper isn't just a luxury; it's an extension of your hand. It manages the tension of the dough without the sticky mess that often discourages new bakers. It keeps your workspace pristine and your hands clean. These tools transform a chaotic kitchen into a focused artisan workspace. They allow you to respect the effort you've put into your starter.
Shaping Success with the Right Scraper
You need a stainless steel scraper for the heavy lifting. Use it for dividing dough and scraping your counter clean. This tool is a "clean-up hack" that saves you at least 15 minutes of scrubbing at the end of your session. When shaping your loaf, use the scraper to pull the dough toward you across the counter. This creates a tight skin on your boule. That tension is what gives your bread its height and prevents it from spreading flat in the oven. It's about control and confidence.
Safe Transfers with The Everloaf Bread Sling
The moment of truth is moving your proofed dough into a screaming hot Dutch oven. Most beginners rely on parchment paper. It's flimsy, it sticks at high temperatures, and it makes centering your loaf nearly impossible. The Everloaf Bread Sling changes the game. It is a reusable tool designed for perfect centering without the risk of painful burns. By supporting the dough evenly, it reduces the risk of deflating your loaf during that final, critical transfer. It treats your dough with the reverence it deserves. Once your loaf is perfectly shaped and ready for its home, you'll want to ensure it stays that way after the bake. Keeping your hard work protected in a beeswax cotton bread bag ensures your crust stays crisp and your crumb stays soft for days.
The Heat Factor: Essential Gear for a Perfect Oven Spring
Heat is the final judge of your sourdough journey. You've spent days nurturing your starter and hours shaping your dough. Don't let a faulty oven dial ruin everything at the finish line. Most home ovens are notorious for lying. Their built-in thermometers often fluctuate by 25 to 50 degrees. This inconsistency is a primary reason why sourdough baking tools for beginners must include an external oven thermometer. It provides the cold, hard truth about your baking environment. If your oven isn't actually at 500°F, you'll never achieve that elusive crackly crust.
Safety is just as critical as accuracy. Standard fabric pot holders are a recipe for disaster when you're handling heavy cast iron at maximum temperatures. You need professional heat-resistant gloves rated for at least 500°F. These allow you to handle your baking vessel with confidence and precision. When you aren't worried about burning your wrists, you can focus on the delicate task of loading your dough. Respect the heat, and it will reward you with a better loaf.
The Science of Steam and Scoring
Steam is the secret to professional expansion. Inside a sealed Dutch oven, the moisture from the dough stays trapped, creating a humid "mini-oven" environment. This steam delays the formation of the crust. It keeps the surface of the dough supple so it can stretch and grow before the heat sets it permanently. This growth is what bakers call "oven spring." Without steam, the crust hardens too quickly, trapping the gases inside and leading to a dense, heavy crumb.
Scoring is the intentional "weak point" you create to control this expansion. A kitchen knife is too thick and dull for this job. It will drag and tear the dough rather than slicing it. A dedicated bread lame uses a razor-thin blade for clean, effortless cuts. A dedicated bread lame allows for a precise 30-degree angle cut, which is essential for creating a professional sourdough ear that opens beautifully during the bake. Beginners should start with a simple "Expansion Cross" or a single long "Ear" slash to see how the dough reacts to the heat.
Choosing Your Baking Vessel
The Dutch oven remains the gold standard for home bakers. Cast iron is the preferred material because of its incredible heat retention and durability. It acts as a thermal battery, keeping the temperature stable even when you open the oven door. Ceramic vessels are beautiful and lighter, but they are more prone to cracking under extreme temperature shifts. While some professionals bake on a stone with a water pan, this method is significantly harder for beginners. It requires manual steam injection and often leads to inconsistent results. Stick with the Dutch oven for guaranteed success.
Post-Bake Perfection: Professional Slicing and 10-Day Freshness
Most beginners murder their bread within minutes of taking it out of the oven. You've spent nearly 24 hours nurturing this loaf. Don't ruin it now. Cutting into hot bread is the number one mistake in the craft. Your bread is still cooking on the inside. The steam needs to redistribute and the starches need to set. If you slice too early, the moisture escapes instantly. You're left with a gummy, sticky interior. Use a cooling rack. It's one of the most underrated sourdough baking tools for beginners. It allows air to circulate around the entire loaf, setting the crumb for that perfect, airy texture.
Once the bread is cool, the challenge shifts to the crust. Traditional artisan loaves have a thick, protective "bark" that standard kitchen knives simply can't handle. You'll end up smushing the delicate honeycomb structure you worked so hard to create. You need a specialized serrated edge. The Sourdough Knife isn't a luxury; it's a necessity for anyone serious about the craft. It respects the integrity of the bread and ensures every slice is as beautiful as the whole loaf.
Slicing Without the Struggle
Stop pressing down on your loaf. Use the "Saw, Don't Press" technique. Let the serrations do the work. A professional blade glides through the toughest crust while keeping the soft interior intact. It prevents the heartbreaking collapse of a beautiful boule. For a deeper look at why specific blades matter, check out our guide on the Best Knife for Cutting Sourdough Bread. Precision matters in every cut.
The "staling myth" is your next hurdle. Sourdough doesn't actually go bad in a day; it simply loses its moisture balance. Selecting the right sourdough baking tools for beginners extends well beyond the oven. Starch molecules crystallize and pull water away from the crumb over time. If you use a plastic bag, you'll get a rubbery, sad crust. If you use a paper bag, you'll end up with a literal rock. Your bread has inherent needs. It needs to breathe while remaining protected from the open air.
The Orvix Solution: 10 Days of Freshness
Beeswax and organic cotton create the perfect micro-climate for your loaf. This combination allows for natural gas exchange while locking in essential moisture. It keeps the crust crisp and the center soft. Our beeswax cotton bread bags are designed to treat your bread with reverence. They offer a sustainable way to enjoy your hard work for up to 10 days. Don't let your masterpiece go to waste. Keep your bread fresh with our Beeswax Cotton Bread Bags and stop settling for stale slices.
Building Your Beginner Toolkit: The Everloaf Philosophy
Your kitchen doesn't need more clutter; it needs better intention. Most people start their journey by buying every gadget they see online. This leads to a crowded counter and a confused baker. The Everloaf philosophy is simple. Focus on quality over quantity. Successful baking is about respecting the entire life cycle of your bread. From the moment you stir your starter to the final, fresh slice ten days later, each step deserves the right support. Choosing sourdough baking tools for beginners should feel like building a heritage collection, not just filling a drawer with plastic.
Sustainability is a core pillar of a modern baker's kitchen. We believe in avoiding single-use waste. Parchment paper, plastic wrap, and disposable bags have no place in a mindful baking process. By choosing reusable, high-quality items like silicone slings and beeswax wraps, you reduce your environmental footprint while improving your bread. You've put days of effort into your starter. Respect that effort by using tools that are built to last as long as your passion for the craft.
Investing in Your Baking Future
Cheap tools often lead to failed loaves and unnecessary frustration. A flimsy whisk that snaps or a dull blade that tears your dough will discourage you before you've even mastered the basics. There is a deep emotional reward in using heritage-inspired tools. They turn a chore into a ritual. When you feel the weight of a professional whisk or the texture of an organic cotton bag, you connect more deeply with the artisan process. Ready to start? Shop the Everloaf curated tool collection and invest in gear that works as hard as you do.
Avoiding Common Beginner Clutter
You don't need a professional bakery to make professional bread. Skip the expensive grain mills, heavy stand mixers, and specialized proofing ovens for now. These are significant investments that can wait until you've mastered the feel of the dough. Many household items can be repurposed while you learn. A heavy ceramic bowl can work for mixing, and your standard oven is more than capable of greatness. Focus your budget on the "Big Four" essentials that directly impact your success rate. Your sourdough baking tools for beginners arsenal should be lean, powerful, and purposeful.
The Essential Beginner's Arsenal Checklist:
- The Danish Dough Whisk: For effortless, clog-free mixing.
- A Digital Scale: For perfect baker's percentages every time.
- A Professional Bread Lame: For safe, precise scoring and beautiful ears.
- The Beeswax Bread Bag: For maintaining 10-day freshness and a crisp crust.
- A Bench Scraper: For shaping tension and easy workspace cleanup.
- A Dutch Oven: For creating the perfect steam-filled baking environment.
Your Journey to Artisan Mastery Starts Here
Your kitchen is no longer a site of chaos. You've moved beyond the "sticky hand" struggle by choosing the right sourdough baking tools for beginners. You have the whisk to master the mix and the sling to conquer the heat. Most importantly, you now have the knowledge to respect the bread's entire life cycle. Success is now a matter of repetition and respect for the craft.
Protect your hard work from the staling myth. Our solution is crafted by culinary professionals from Lyon, France, using 100% organic cotton and pure beeswax. It reduces plastic waste and locks in essential crumb moisture while maintaining that perfect, crackly crust. Keep your hard-earned sourdough fresh for 10 days with the beeswax Bread Bag. Give your bread the specialized attention it deserves.
Go forth and bake. The community of enthusiasts is waiting to see your results. Trust your tools. Trust your starter. Your next golden boule is already calling.
Frequently Asked Questions
What are the absolute minimum tools I need for sourdough?
You only need four core items to start: a digital scale, a large mixing bowl, a Dutch oven, and a bread bag. Precision is the soul of this craft. You can't achieve consistent results by eyeballing measurements. These specific sourdough baking tools for beginners cover the entire process from the first mix to the final, fresh slice. Don't waste money on gadgets until you have these essentials.
Can I use a regular serrated knife instead of a sourdough knife?
A standard serrated knife often fails because artisan crusts are significantly tougher than store-bought bread. You'll end up crushing the delicate internal honeycomb structure you worked so hard to build. The Sourdough Knife features a specialized edge designed to saw through thick, crunchy "bark" without applying downward pressure. It respects the integrity of your loaf and ensures every slice is a masterpiece.
Is a Dutch oven really necessary for a good crust?
Yes, a Dutch oven is the most reliable way for beginners to trap steam during the bake. Steam is the only reason you get that elusive, crackly crust and maximum expansion. While some pros use baking stones and water pans, that method is difficult to control in a home kitchen. Stick to the Dutch oven for guaranteed success and a professional finish every time.
How do I keep my sourdough fresh for more than two days?
Use a beeswax bread bag to maintain the perfect moisture balance for up to ten days. Plastic bags make your crust rubbery and sad. Paper bags turn your bread into a literal rock within hours. Sourdough has inherent needs that only a breathable, natural barrier can satisfy. This sustainable tool keeps your crumb soft and your crust crisp for over a week.
Why is my sourdough sticking to the parchment paper?
High-hydration dough often bonds with cheap, low-quality parchment paper at high temperatures. This frustration can ruin a perfectly proofed loaf during the transfer. Switch to The Everloaf Bread Sling to eliminate this problem entirely. It provides a reliable non-stick surface and makes moving your dough into a 500°F Dutch oven much safer. Stop fighting your paper and start focusing on your bake.
What is the difference between a dough whisk and a regular whisk?
A regular balloon whisk clogs instantly with thick, sticky dough. It creates a mess that is nearly impossible to clean. The Danish Dough Whisk uses three concentric stainless steel loops to slice through flour and water without trapping ingredients. It is a fundamental part of any sourdough baking tools for beginners kit because it incorporates flour three times faster than a wooden spoon.
Do I need a banneton to proof my bread?
You can start with a bowl lined with a floured tea towel, but a rattan banneton is superior for crust development. Rattan allows the dough to breathe and wicks away excess surface moisture. This creates a better "skin" for scoring and a crunchier final result. If you're serious about the craft, a real proofing basket is a worthy investment that honors your process.
How do I clean a beeswax bread bag?
Use cool water and a tiny drop of mild soap to clean your bag. Never use hot water. Heat will melt the wax and ruin the bag's protective properties instantly. Simply rinse it, let it air dry, and it's ready for your next artisan loaf. It's a simple, sustainable ritual that protects your hard work and respects the quality of the items you handle.


