

What if your freezer wasn't a graveyard for your sourdough, but its high-tech time capsule? You've likely felt the heartbreak of pulling a beautiful loaf from the ice, only to end up with a gummy crumb or a rubbery crust. It's a frustrating waste of premium organic ingredients and your hard work. With 71% of consumers ranking texture as the most important part of their food enjoyment, a soggy slice simply won't do. You deserve that signature crackle every single time. Mastering the best method for thawing frozen sourdough is the difference between a sad sandwich and a culinary masterpiece.
I understand the reverence you have for a perfect bake. Your bread has inherent needs. It deserves to be treated with specialized attention even after it's been frozen. This guide promises to show you how to revive your loaf to its original, "just-baked" glory without losing the airy interior you love. We'll explore the essential two-stage restoration process. You'll learn how to manage gentle moisture redistribution followed by a high-heat wake-up call that guarantees a crispy, hydrated finish with zero food waste.
Key Takeaways
- Lock in peak moisture by freezing your loaf immediately to preserve the living crumb.
- Master the best method for thawing frozen sourdough with a patient, room-temperature rest.
- Apply the "Flash-Refresh" technique to restore that signature crackly crust and soft interior.
- Avoid the microwave trap and plastic wrap to prevent a gummy, rubbery texture.
- Treat your revived bread with reverence to ensure every slice tastes like it just left the oven.
Why Freezing Sourdough is the Ultimate Freshness Hack
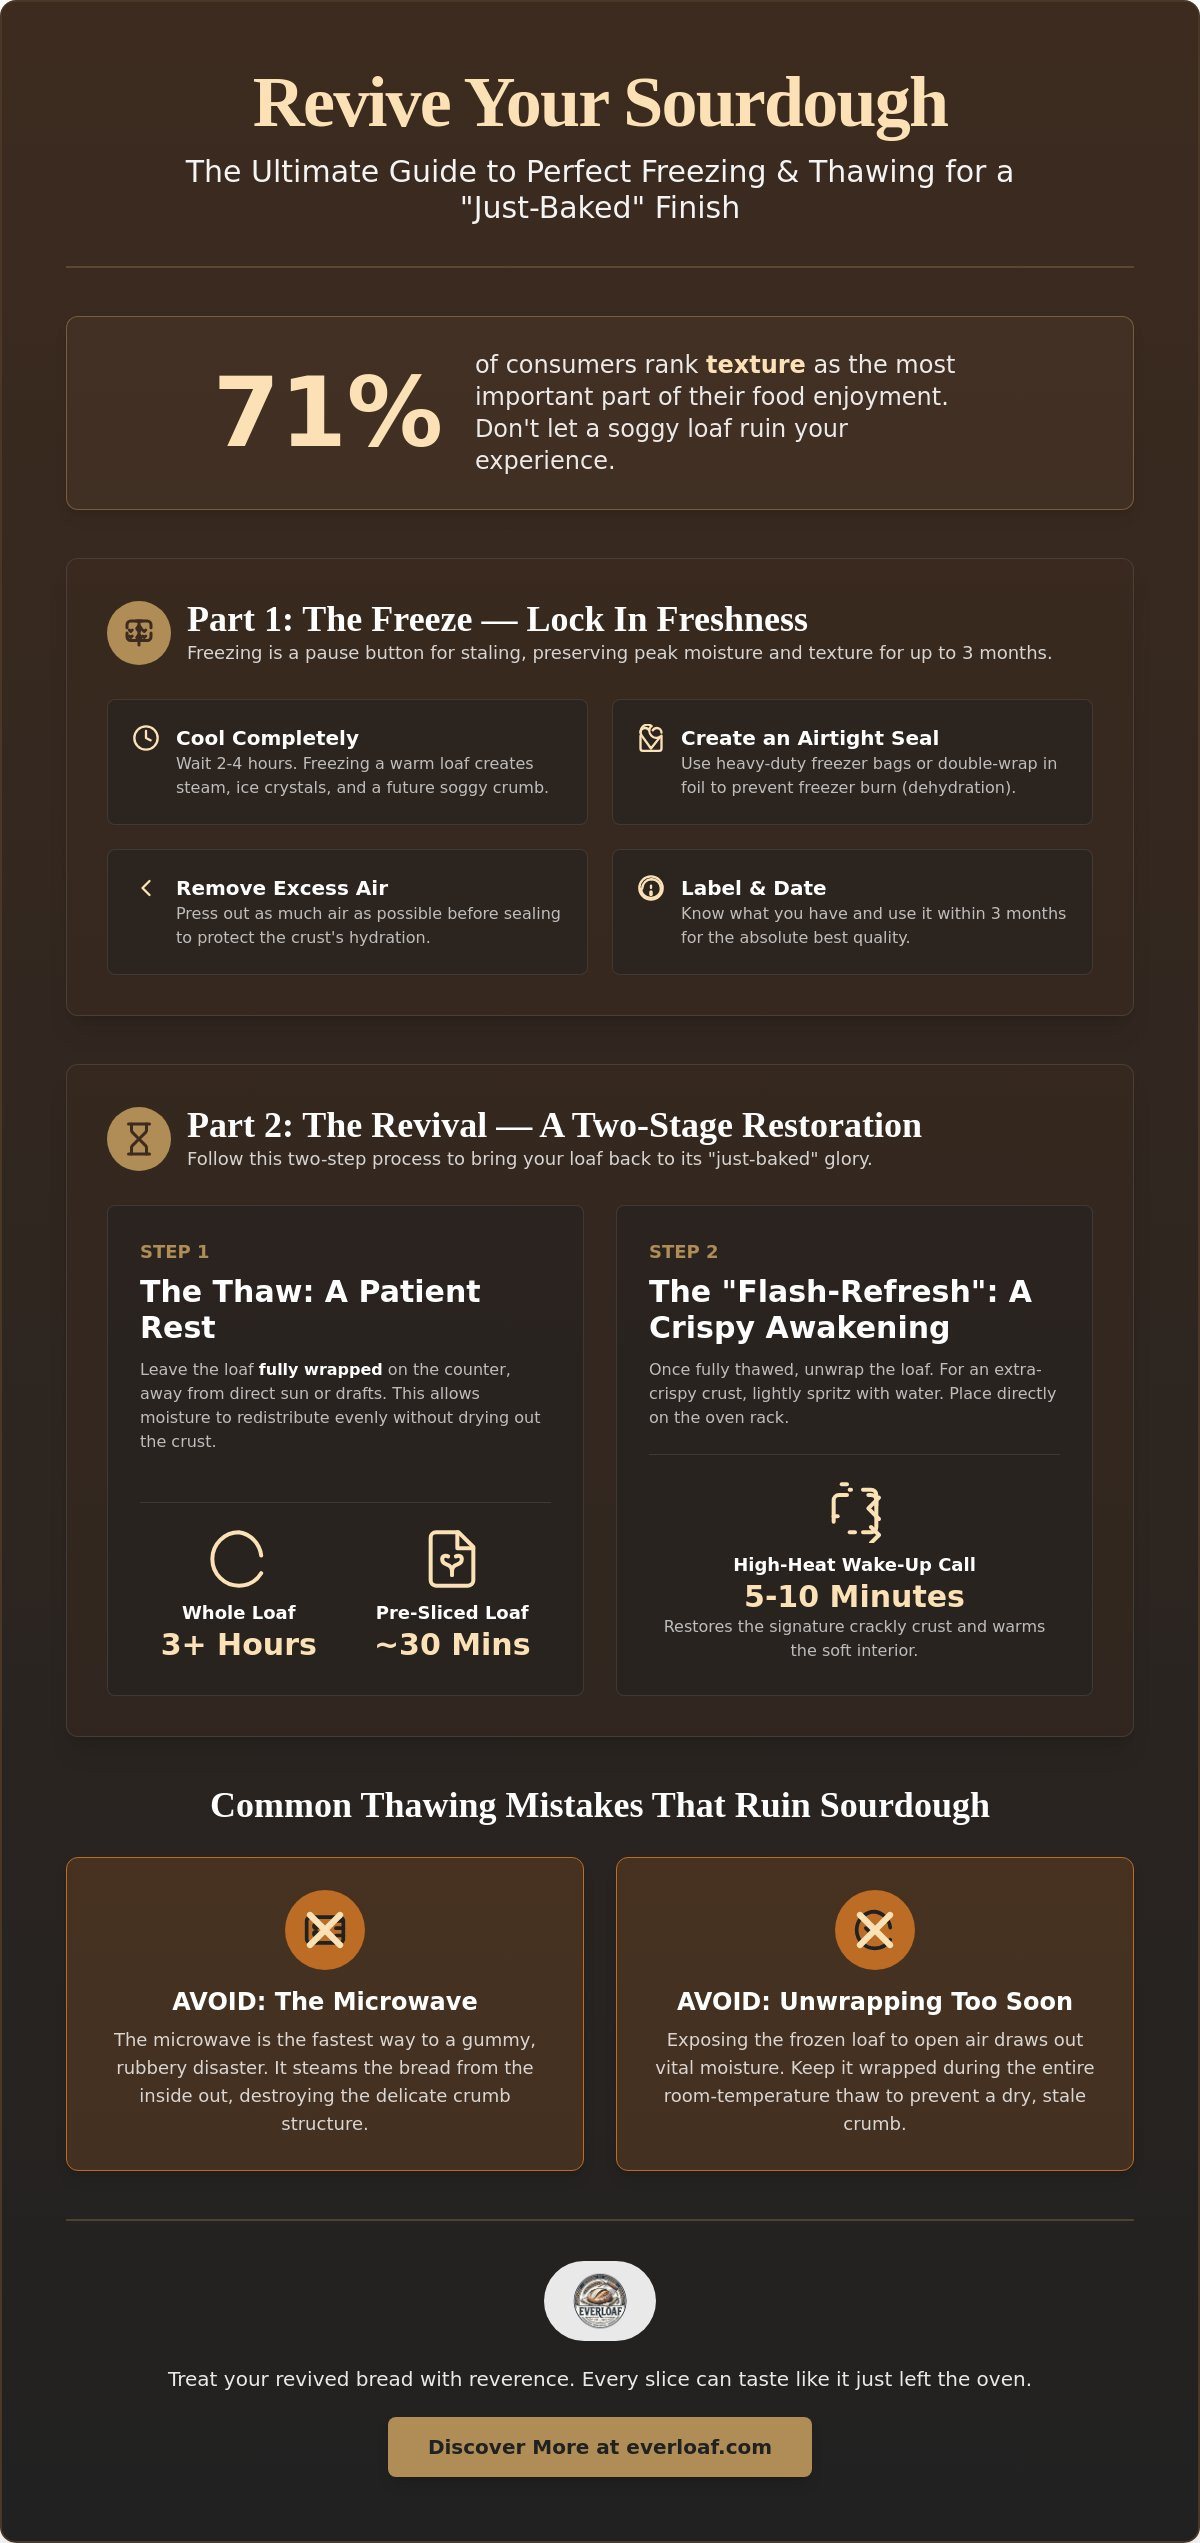
Sourdough is alive. It's a masterpiece of fermentation and fire. But the moment that loaf leaves the oven and begins to cool, the clock starts ticking. Staling is a chemical reality, not just a suggestion. To truly respect the craft, you must understand that freezing isn't just a storage choice. It's a pause button. When you freeze your bread at its absolute peak, you lock in the moisture content of the crumb before it can escape. This intervention is the only way to preserve the "just-baked" quality for weeks. Properly handled, your sourdough can stay perfect for up to 3 months in the deep freeze without losing its signature tang or texture.
The entire goal of using the best method for thawing frozen sourdough is to reverse a process called starch retrogradation. This is when the starches in your bread crystallize and become hard. By freezing quickly and thawing correctly, you force those starches to reabsorb moisture. Understanding what is sourdough bread at a biological level helps you see why it's so resilient. It isn't just flour and water; it's a complex structure that deserves specialized care.
The Science of the Deep Freeze
Low temperatures do more than just keep things cold. They halt the crystallization of wheat starches. Sourdough has a distinct advantage over commercial bread here. Its natural acidity acts as a stabilizer. This high acid content makes it significantly more freezer-stable than standard store-bought loaves. However, the freezer is a dry environment. You must use an airtight seal. Without it, the cold air will strip the hydration from your crust. This leads to freezer burn, which is essentially permanent dehydration. Protect your bread like the investment it is.
Peak Freshness: When to Freeze Your Loaf
Timing is everything. You must wait for the loaf to reach room temperature before it goes near the ice. Freezing a warm loaf is a recipe for disaster. The residual heat creates steam inside the packaging. That steam turns into ice crystals. When you eventually start the best method for thawing frozen sourdough, those crystals melt and leave you with a soggy, gummy interior. Patience pays off. Once the bread is cool, seal it immediately. If you're keeping a fresh loaf on the counter before freezing, use The beeswax Bread Bag to maintain its hydration levels. This ensures you're freezing a loaf that is still soft and hydrated, not one that has already begun to dry out.
- Wait at least 2 to 4 hours for a full loaf to cool completely.
- Use heavy-duty freezer bags or double-wrap in foil.
- Remove as much air as possible from the packaging.
- Label your bread with the date so you use it while it's prime.
The Best Method for Thawing Frozen Sourdough
The best method for thawing frozen sourdough isn't a secret hack. It's a commitment to patience. The room temperature thaw is the most reliable way to protect the structural integrity of your loaf. Stop the urge to unwrap it immediately. Your bread needs to stay in its original wrapping during this stage. This seal prevents vital moisture from escaping into the dry air of your kitchen. If you expose the cold crust too soon, you risk a dry, stale crumb before you even reach for the oven. Trust the process and let the bread acclimate slowly.
Environment matters more than you think. Avoid drafty areas or spots with direct sunlight. Sun exposure can create internal condensation inside the bag. This leads to a soggy bottom and a ruined crust. Before you move to the refresh stage, perform a softness check. Give the boule a gentle squeeze. It must feel soft and yielding all the way to the center. If you feel a hard, icy core, it stays on the counter. Rushing this step results in a loaf that's hot on the outside but frozen in the middle.
Thawing Whole Boules vs. Pre-Sliced Loaves
Whole boules are the gold standard for moisture retention. The thick crust acts as a natural insulator for the interior. However, your slicing strategy is your best "emergency" tool. If you pre-sliced your loaf before freezing, you've cut your wait time from hours to just 30 minutes. The challenge is separating them without a massacre. Don't pry frozen slices apart with force. Let the loaf sit for five minutes to soften the edges. Then, use a thin knife to gently nudge them apart. This protects the delicate, airy crumb from tearing.
The Countertop Timeline
Three hours is the magic number for a standard 500g to 800g loaf. This timeline ensures the starches have enough time to begin reabsorbing moisture. Your kitchen's ambient temperature is the primary variable here. A cold winter kitchen will drag the process out, while a warm summer day speeds it up significantly. The ideal environment for thawing sourdough is a stable 70°F with zero airflow. Once your loaf is fully thawed and soft, it's ready for its final transformation. Keeping your revived bread in a beeswax bread bag ensures it stays hydrated while you wait for the oven to preheat. Treat your bread with the reverence it deserves, and it will reward you with that "just-baked" glory.
The "Flash-Refresh" Technique for a Crispy Crust
You’ve followed the steps. Your boule is soft to the core. But something is still missing. It feels slightly damp and lacks that iconic, glass-like crackle. Don’t panic. This is exactly where the room-temperature thaw leaves you. To cross the finish line, you must master the "Flash-Refresh." This technique is the cornerstone of the best method for thawing frozen sourdough. It uses targeted high heat to re-awaken the loaf. It forces the starches to gelatinize and the crust to recrisp. This step is non-negotiable. If you skip it, you’re settling for mediocrity. Your bread deserves better.
Think of this as a wake-up call for your bread. We aren't just heating it up. We are restoring its soul. Research from 2026 shows that 71% of consumers value mouthfeel and texture as a key driver of food enjoyment. That crunch is vital. By using a controlled 350°F (175°C) environment, you ensure the center gets hot without scorching the exterior. This temperature is the sweet spot for structural revival. It transforms a "thawed" loaf back into a "fresh" one in minutes.
The Water Misting Secret
Professional bakers use steam to create magic. You can do the same at home with a simple spray bottle. Before the loaf hits the heat, give the crust a light misting of filtered water. You aren't bathing the bread. A fine, even mist is all it takes. This moisture acts as a thermal conductor. It prevents the crust from setting too quickly. As the water evaporates, it creates a miniature steam oven right on the surface of your loaf. This allows the skin to expand and regain its characteristic crunch. This is the best method for thawing frozen sourdough because it replaces the humidity the freezer tried to steal. Without this moisture, your crust might turn out tough rather than crispy.
Timing Your Oven Refresh
Preheat your oven fully before starting. Place your misted loaf directly on the middle rack for maximum airflow. Bake for 5 to 10 minutes. A smaller baguette might only need 5, while a heavy boule will need the full 10. Use the "Tap Test" to verify your success. Pick up the loaf with a towel and tap the bottom with your knuckle. You want to hear a clear, hollow ring. If the sound is thuddy, the core is still holding too much moisture. Once you hear that hollow song, remove it immediately. Now comes the hardest part: waiting. Let it rest for 10 minutes on a wire rack. This rest allows the internal steam to redistribute. It ensures your first slice is perfect and airy, not gummy.
Common Thawing Mistakes That Ruin Sourdough
Stop sabotaging your hard work. You’ve nurtured your starter and perfected your crumb. Don’t throw that effort away with a lazy thawing technique. Most people treat frozen bread like a commodity. It isn't. It's a living product with inherent needs. The best method for thawing frozen sourdough requires respect for the science of moisture. If you ignore these common pitfalls, you’ll end up with a loaf that’s fit for the bin, not the table.
Leaving your bread "naked" on the counter is a frequent error. Thawing bread uncovered leads to evaporative staling. The dry air in your kitchen acts like a sponge. It pulls the essential hydration out of the crumb before you can even preheat the oven. You end up with a dry, dusty texture. Similarly, never refreeze a loaf once it has thawed. Refreezing destroys the delicate cell structure of the gluten. It turns a professional boule into a crumbly mess. Commit to the process once and do it right.
Why the Microwave Fails!
The microwave is the absolute enemy of artisan texture. It doesn't heat; it attacks. Microwaves vibrate water molecules at extreme speeds. This causes rapid steam that turns your carefully developed gluten into a rubbery nightmare. Have you noticed how microwaved bread feels soft for thirty seconds and then turns into a literal rock? That is the "rock-hard" phenomenon. As the bread cools, the starch molecules re-crystallize even harder than before. If you are truly in a rush, use power level 3 in 10-second bursts. But be warned. You are compromising quality for speed.
The Danger of High-Heat Thawing!
Impatience is the most expensive mistake in baking. Shoving a brick-frozen loaf into a 450°F oven is a disaster. The outside will scorch and burn while the center remains a block of ice. This creates the dreaded "gummy ring." It’s a layer of under-hydrated, dense dough just beneath the crust. Slow and steady always wins this race. You must follow the best method for thawing frozen sourdough by allowing a full room-temperature rest first. This ensures the temperature transition is even and thorough.
To prevent moisture loss during this critical waiting period, keep your loaf protected in The beeswax Bread Bag. It’s the only way to ensure your bread stays hydrated and ready for its final refresh. Don't let a drafty kitchen ruin your crust. Seal in the quality and respect the craft.
Post-Thaw Care: Keeping Your "New" Loaf Fresh
Reviving your loaf is a triumph. But don't let that victory fade. Thawed sourdough stales faster than a fresh bake because the moisture has already traveled a long road. Once you've applied the best method for thawing frozen sourdough, your care must continue until the last crumb is gone. Your bread is now at its most vulnerable. It needs a storage solution that respects its delicate hydration levels. Stop using plastic wrap immediately. Plastic is a cage. It traps moisture against the crust, turning your beautiful, crackly exterior into a soggy, rubbery mess. You worked too hard for that crunch to let it vanish in a plastic bag.
The goal is balance. You need a breathable, natural barrier that maintains the perfect crust-to-crumb ratio. This allows excess moisture to escape while keeping the interior hydrated. To ensure your revived loaf stays in peak condition, invest in The beeswax Bread Bag. It is the professional standard for post-thaw care. It treats your bread like the artisanal masterpiece it is.
The Power of Beeswax Storage
Organic cotton infused with beeswax is a game-changer for sourdough enthusiasts. It allows the bread to "breathe" without drying out. This is why the Orvix bread bag is superior to paper or plastic. Paper is too porous and steals moisture. Plastic is too airtight and creates mush. A specialized beeswax bread bag can keep your sourdough fresh for up to 10 days. This longevity is essential when you're managing a revived loaf. It gives you the freedom to enjoy your bread on your own timeline.
Slicing for Longevity
How you cut your bread matters. Use a dedicated Sourdough Knife to protect the revived crumb. A dull blade will crush the airy holes you worked so hard to restore. Precision is key. Only slice what you need for your current meal. This keeps the rest of the loaf protected from the air. When you return the loaf to your bag, store it cut-side down. This simple move locks in hydration at the most exposed point. Even after using the best method for thawing frozen sourdough, these small habits ensure your last slice is just as glorious as the first.
- Never store bread in the refrigerator; it accelerates staling.
- Keep your bread bag in a cool, dry place away from the stove.
- Refresh individual slices in a toaster for an instant "just-baked" feel.
Master Your Sourdough Revival!
Your bread is more than just food. It's a craft. You've learned how to halt time with the freezer and how to wake your loaf up with the Flash-Refresh. Mastering the best method for thawing frozen sourdough ensures that every slice retains its soul. You don't have to settle for rubbery crusts or gummy interiors anymore. You now have the professional tools to achieve bakery-fresh results in your own kitchen every single morning.
Respect the process from start to finish. Your revived bread needs a home that allows it to breathe. Stop wasting your hard-earned loaves; protect your sourdough with our Orvix Beeswax Bread Bags. These bags are crafted from 100% organic cotton with a pure beeswax infusion for natural preservation. They were designed by culinary professionals from Lyon who understand that quality is non-negotiable. Join a community of enthusiasts who refuse to compromise on texture.
Take control of your kitchen. Your sourdough deserves the best care possible. We're here to support your journey toward the perfect, crackly crust every single day. Go forth and slice with confidence!
Frequently Asked Questions
Can I toast sourdough directly from the freezer?
Yes, you can toast individual slices directly from the freezer with excellent results. This is the most efficient way to handle pre-sliced bread without losing moisture. Place the frozen slice into your toaster or a hot skillet immediately. The rapid heat prevents the crumb from becoming rubbery during a slow, unprotected thaw.
How long does sourdough take to thaw at room temperature?
A standard whole boule typically requires three hours to reach its core. Smaller loaves or baguettes may only need two hours depending on your kitchen's ambient temperature. Keep the loaf in its original airtight wrapping during this time. This prevents the dry air from stealing the bread's essential hydration before it fully acclimates.
Is it better to freeze sourdough whole or sliced?
Freezing whole loaves is the superior choice for long-term moisture retention and structural integrity. A whole loaf protects the delicate interior crumb from the drying effects of the freezer. However, pre-slicing is a practical "emergency" option if you only need a single slice at a time. Just ensure your slices are tightly sealed to prevent freezer burn.
Why does my sourdough get gummy after thawing?
Gummy textures are usually the result of trapped moisture or improper cooling before freezing. If you freeze a loaf while it's still warm, steam turns into ice crystals that melt back into the crumb during the thaw. Following the best method for thawing frozen sourdough, which includes a complete room-temperature rest and a "Flash-Refresh" in the oven, will eliminate this dampness.
Can I refreeze sourdough bread after it has been thawed?
No, you should never refreeze sourdough once it has reached room temperature. The process of thawing and refreezing destroys the cellular structure of the gluten. It leads to a crumbly, dry texture that no amount of oven refreshing can fix. Only thaw what you plan to consume within 48 hours to ensure zero food waste.
How do I refresh a whole loaf of sourdough in the oven?
Preheat your oven to 350°F and mist the thawed crust lightly with filtered water. Place the loaf directly on the middle rack for 5 to 10 minutes until it passes the "Tap Test." This technique is the best method for thawing frozen sourdough to its original glory. It forces the starches to re-gelatinize and restores the signature crackle to your crust.
What is the best way to prevent freezer burn on sourdough?
Air is the enemy of your bread's longevity. Use a double-layer seal, such as a heavy-duty freezer bag with all the air squeezed out, to protect the loaf. For the highest standard of care, ensure your bread is perfectly hydrated before it enters the freezer. A beeswax bread bag is an ideal tool for maintaining this hydration during the cooling phase.
How long will thawed sourdough stay fresh?
Thawed sourdough is at its peak for 24 to 48 hours after its oven refresh. Because the starches have already undergone one cycle of retrogradation, the bread will stale faster than a fresh loaf. Store your revived bread in a breathable, natural barrier like a beeswax wrap to maintain the crust-to-crumb ratio for as long as possible.


